Discover 3 stunning DIY macrame bracelet ideas! From the protective Evil Eye to elegant gold hearts, we break down the simple knotting techniques you need to master today.
Is there anything more grounding than the feeling of nylon cord gliding through your fingertips? For those who love tactile crafts, macrame is a gateway drug. It is accessible, requiring only a few yards of cord and some basic beads. But the results? They can be truly breathtaking.
Today, we are looking at three completely distinct bracelet designs: a sparkling Red & Silver beaded bracelet, a culturally rich Red Evil Eye amulet, and a romantic set of Neutral Gold Heart bracelets.
They look like they belong in three entirely different boutiques, yet they share a beautiful secret. They are all built upon the exact same foundation. Once you master the simple Square Knot, you can weave all three of these gorgeous designs in a single afternoon. Let’s dive into the blueprint.
The “Master Blueprint”: The Square Knot Weave
Before we customize, we need to master the foundation. If you have never made a macrame bracelet before, this is where you start.
Why the Square Knot is the Foundation of Macrame
The Square Knot (often called the Cobra Weave) is the bread and butter of this craft. It creates that beautiful, textured, braided “rope” look you see running through all three images. It involves two “working cords” weaving around two stationary “center cords.”
The secret to a beautiful Square Knot is tension. If you pull too loosely, the bracelet looks lumpy. If you pull too tightly, the center cords can warp and the bracelet will curl. The key is to pull with a consistent, firm, and gentle pressure with your fingers.
The Materials You’ll Always Need
For every single one of these projects, your base toolkit looks the same:
- 1mm Waxed Polyester Cord: This is non-negotiable. Waxed cord grips the knots and prevents fraying.
- Sharp Fabric Scissors: To make clean, precise cuts.
- A Bic Lighter: To melt and seal the raw ends.
- A Binder Clip or Clipboard: To anchor your bracelet to a table while you weave with two hands.
Design Idea #1: The Classic Red & Silver Beaded Bracelet
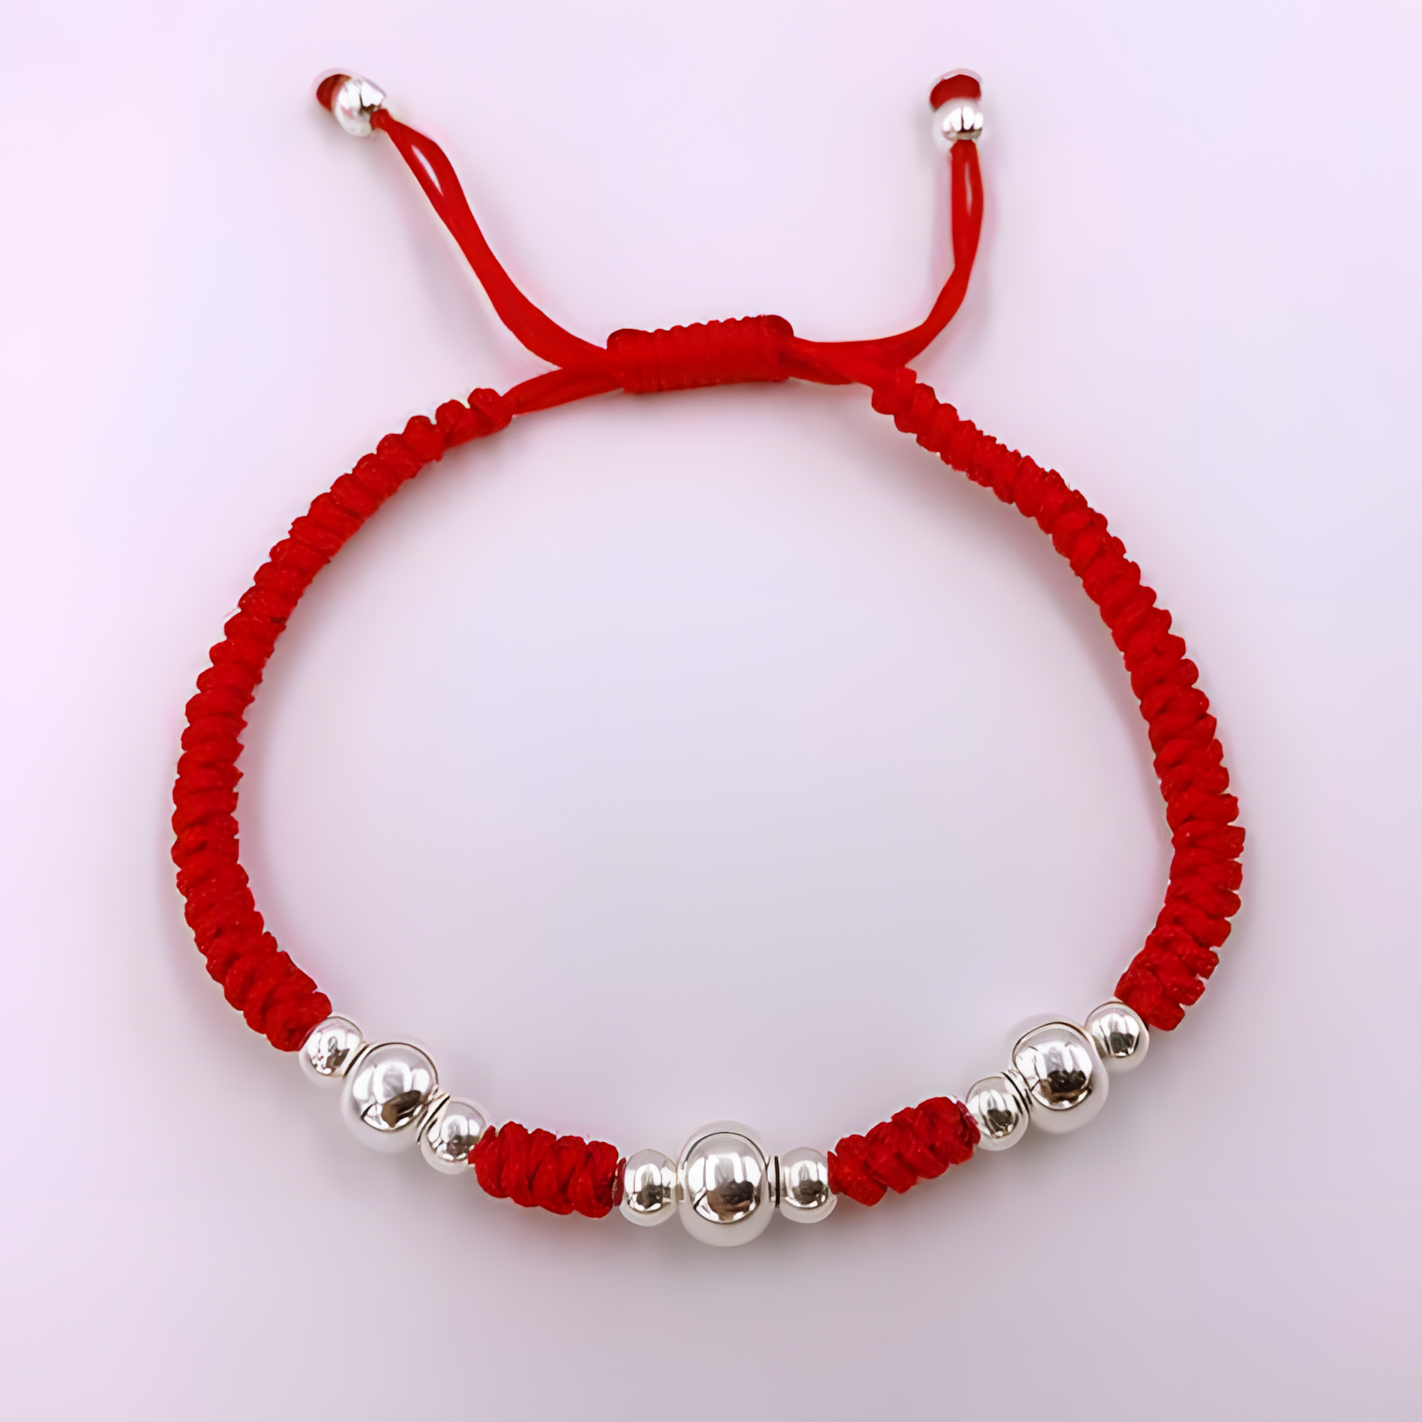
Let’s start with the beautiful red bracelet adorned with silver spheres, shown in our first image.
The Symbolism of Red and Silver
Red string bracelets are deeply woven into human culture. From the Kabbalah tradition in Judaism to Chinese folklore, a red string is often worn to ward off the “evil eye” and attract good luck and protection. Pairing that vibrant, lucky red with polished silver beads creates a striking, elegant contrast. The silver catches the light, adding a touch of sophistication to a deeply symbolic piece.
The Weaving Strategy
To achieve this exact look, you will use a technique I call the “Partial Weave.”
- Step 1: Tie 8 to 10 square knots to create the starting band.
- Step 2: Take the two center cords (the ones underneath your weave). Thread a small silver round bead onto them. Push the bead up against your last knot.
- Step 3: Tie a single Square Knot directly beneath the bead to lock it in place.
- Step 4: Repeat this pattern. The image shows a specific rhythm: two small beads, a knot, a larger center bead, a knot, and then two more small beads.
By using silver beads of varying sizes (3mm and 6mm), you create a beautifully varied, rhythmic focal point that elevates the simple woven band into a piece of art.
Design Idea #2: The Red Evil Eye Bracelet
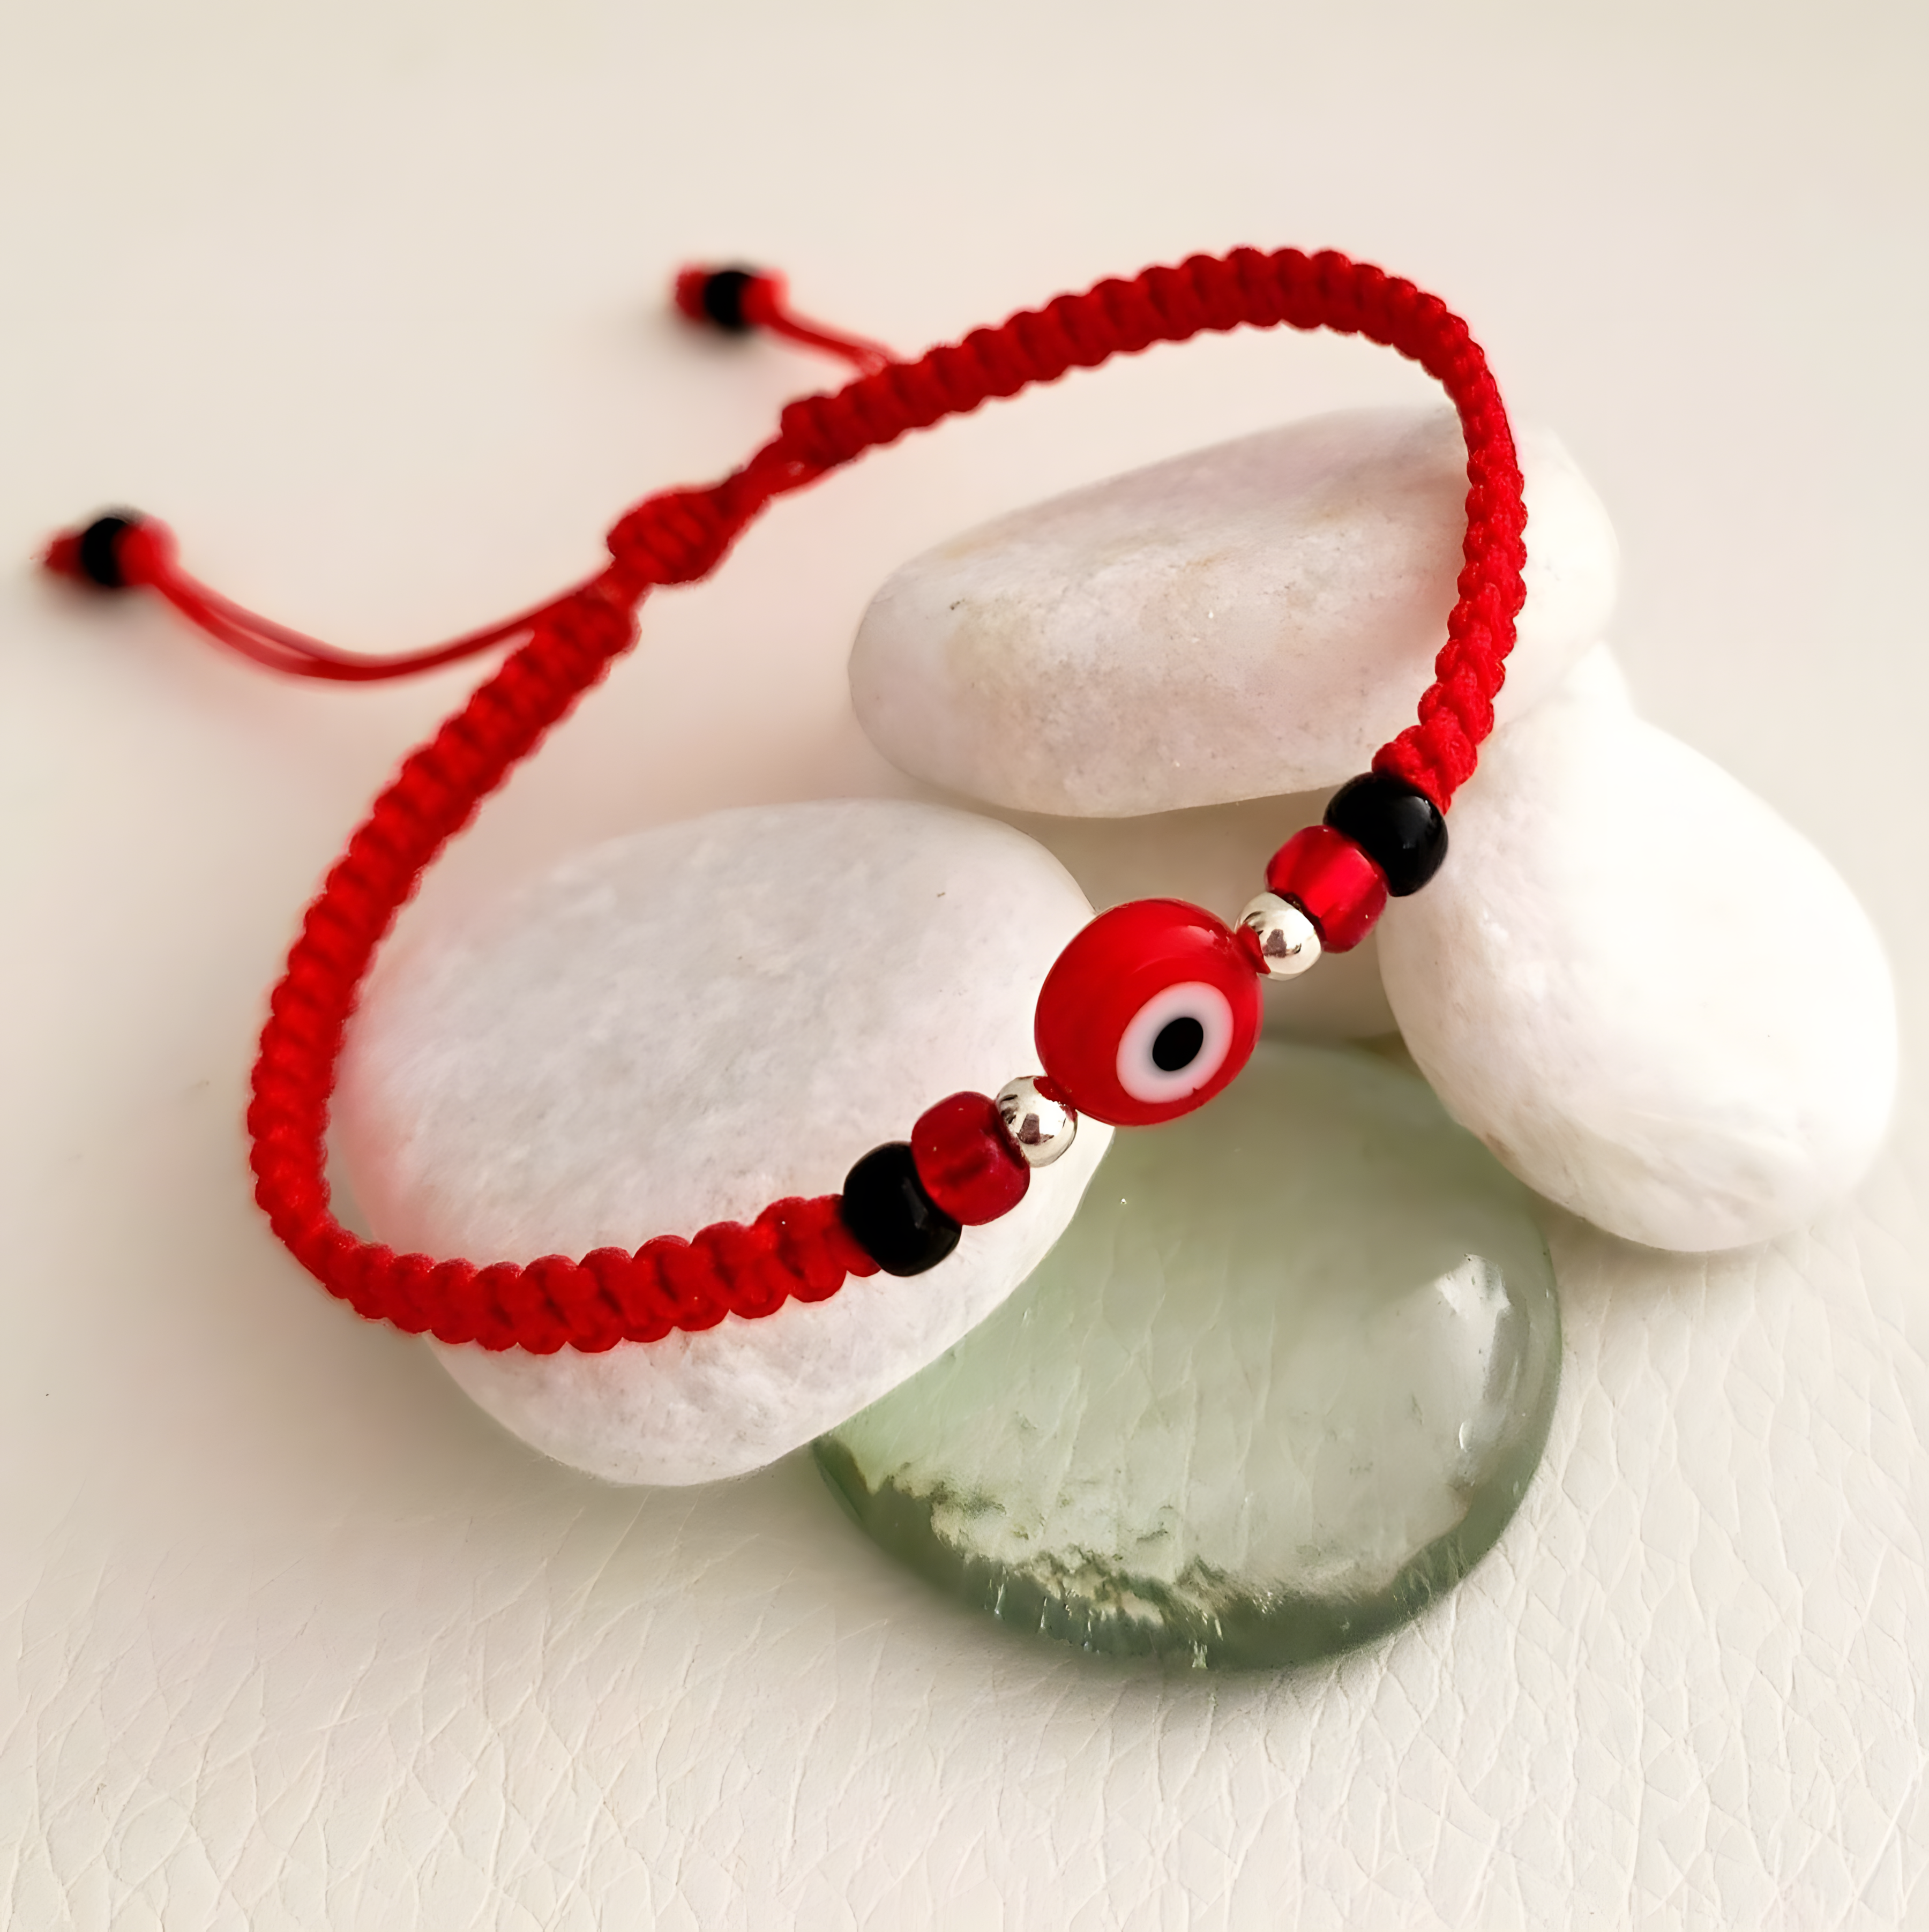
Next, we move to the deeply protective Evil Eye bracelet.
The Ancient Tradition of the Evil Eye
The “Nazar” or Evil Eye amulet is one of the oldest protective symbols in human history. Originating in the Mediterranean and the Middle East, it is believed that a malicious glare—usually born from jealousy—can cause misfortune or injury. The brightly colored glass eye is designed to reflect that malice back to the sender. Wearing this bracelet is a beautiful way to carry a barrier of energetic protection with you.
The “Sandwich” Beading Technique
Looking at the second image, you will notice that the focal beads are perfectly framed by the red cord. To achieve this “Sandwich” technique, follow this exact order on your center cords:
- Thread a small red glass bead.
- Thread a tiny silver spacer bead.
- Thread the large, flat Evil Eye bead.
- Thread another tiny silver spacer.
- Thread another small red glass bead.
Push this entire sequence tight against your last Square Knot. Then, tie a solid Square Knot immediately beneath the final red bead. The silver spacers are critical here; they act as “friction buffers,” ensuring the flat glass Evil Eye bead doesn’t get scratched or warped by the tight nylon cord. This design is not just protective; it is visually striking, with the black accents in the eye perfectly matching the black bead accents at the very ends of the bracelet tails.
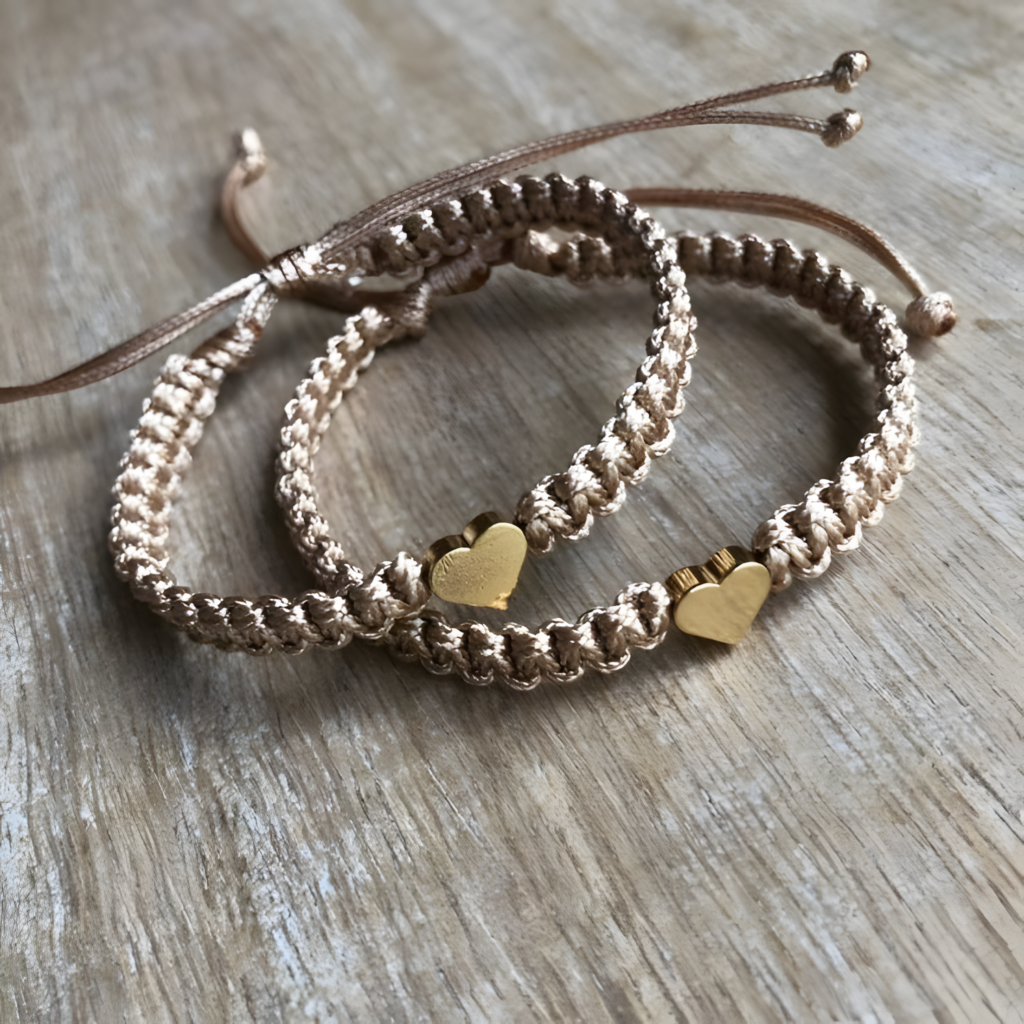
Design Idea #3: The Romantic Neutrals & Gold Heart Set
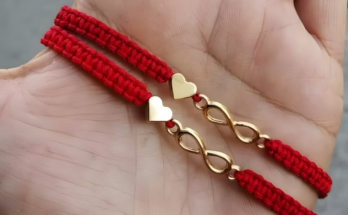
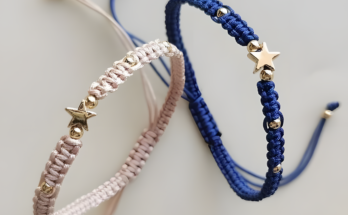
Finally, we look at the softly elegant paired bracelets in neutral tones with gold hearts.
Minimalist Elegance in Natural Tones
There is something inherently luxurious about a neutral color palette. These beige, nude, and ivory cords remind us of sand and beach stones. When paired with a solid, high-polish gold heart, the result is a minimalist, high-end aesthetic. These bracelets are incredibly wearable, looking just as stunning with a sundress as they do with a winter sweater.
The “Continuous Weave” with a Focal Point
This is the simplest of the three designs to construct. You do not need to interrupt your weave to add multiple beads. Instead, you create a single, continuous band of Square Knots.
To center the heart perfectly, count your knots. For example, tie 12 knots. Then, take the center cords, thread the gold heart charm onto them, and push it up against the 12th knot. Tie a tight Overhand Knot behind the heart to lock it into place. Then, simply continue the Square Knot pattern for another 12 knots.
Because these are a matching set, precision is paramount. Use a ruler to measure the exact inch-length of the first bracelet, and ensure the second bracelet ends at the exact same measurement. Gift them to a partner or a best friend as a physical symbol of your bond.
The Universal Finish: The Adjustable Sliding Knot Closure
If you look at the ends of all three bracelets in the images, you will notice they don’t use metal clasps. They use a sliding knot. This is the most professional finish you can give a macrame bracelet, and it fits wrists of all sizes.
Why One-Size-Fits-All is Essential
The “Sliding Knot” (often called a Double Half-Hitch barrel knot) is a cord-wrapping technique. You take the two loose tail cords at the end of your weave. You take one tail, wrap it tightly around the other parallel cords 4 or 5 times, and tuck the end through. You repeat this on the other side.
Because of the physics of friction, these wraps allow the parallel cords to slide through the center. The wearer pulls the tails to tighten the bracelet, and pulls the bracelet apart to loosen it. It eliminates the need for expensive metal hardware.
Sealing the Ends with Fire
The final touch is sealing the ends of the tails. Take your lighter and briefly pass the flame near the tips of the cut cords. The nylon will melt into a hard, glossy bead. Let them cool for 3 full seconds before touching them. This creates the beautiful, rounded cap ends you see in all three images, preventing any fraying or unraveling forever.
Pro-Tips for Stunning Results
To help you achieve professional results on your first attempt, keep these three rules in mind:
Controlling Your Tension
The most common mistake beginners make is pulling the center cords too tight while tying the outer knots. This causes the bracelet to curl into a “banana” shape. Keep the center cords straight and flat as you pull the outer knots.
Sourcing High-Quality Charms
Cheap gold and silver plating will tarnish within a week of wearing. Look for “Zinc Alloy” or “Stainless Steel” charms. They are hypoallergenic and will keep their shine through daily wear.
The “Knot Count” Method
If you are making a matching set (like the heart bracelets), use a piece of masking tape on your table to mark exactly where your “focal point” should sit. Weave until your knot reaches the tape, add your charm, and weave the rest. This guarantees perfect symmetry.
Conclusion: A Thread for Every Emotion
Macrame is one of the most forgiving, rewarding crafts you can learn. These three designs—the protective silver bead, the warding Evil Eye, and the romantic gold heart—prove that with one simple knotting technique, you can convey three entirely different meanings.
Whether you are weaving a bracelet for yourself as a shield against the stress of the world, or for a loved one to remind them of your connection, you are doing more than just making jewelry. You are weaving intention. You are weaving care.
Now, I want to hear from you. Which of these three styles has stolen your heart? Are you going to start with the protective Evil Eye or the romantic Heart set? Drop your choices, your color ideas, and your questions in the comments below—I can’t wait to see what you create!